Candy-Shaped Papillotes – Tips and Folding Method for Candy-Shaped Papillotes
Easily make these small candy-shaped papillotes — it’s child’s play!
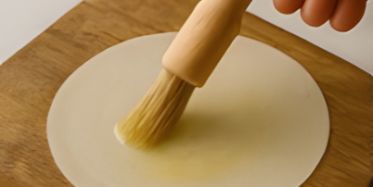
🍬🟠 Illustration 1: 10 cm round sheet
- The operator lightly brushes the sheet with melted butter or neutral oil to make it more flexible and golden when baked.
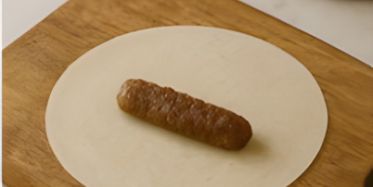
🥄 Illustration 2: Placing the filling in the center
- A small spoonful of compact filling is placed in the center, horizontally across the sheet:
- Savory version: cream cheese & herbs, vegetable purée, ground meat…
- Sweet version: date paste, crushed dried fruits, praline, almond paste…
- The filling forms a small log in the center of the sheet, aligned widthwise and not touching the edges.
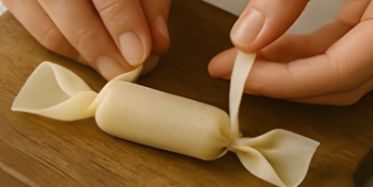
🎁 Illustration 3: Rolling like a candy
- The operator folds the top and bottom edges over the filling, then rolls the sheet over itself to form a small cylinder.
- The ends of the sheet are left free, sticking out on each side.

✨ Illustration 4: Twisting the ends
- Once rolled, the operator grabs the two ends of the sheet (like candy wrappers) and gently twists them outward.
- This creates a well-sealed candy shape, with a slightly bulging center (holding the filling) and two twisted ends, like wrapped candy.
- If needed, the ends can be secured with a small chive stem or kitchen string, or lightly moistened to seal.
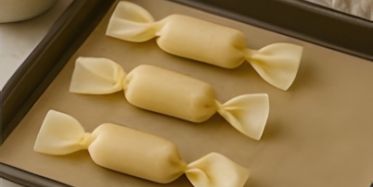
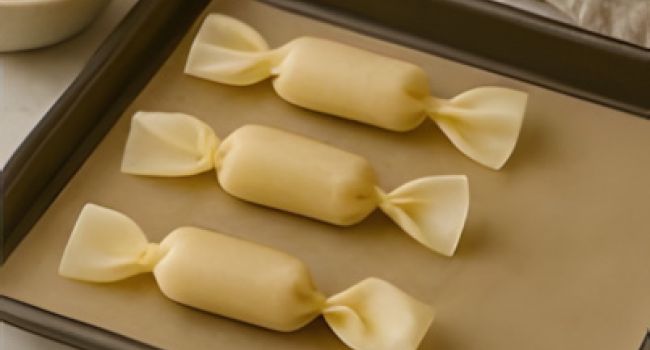
🍯 Step 5: Candies ready to bake
- The candies are placed on a baking tray, slightly spaced apart.
- A light brush of melted butter is applied for a golden finish.